Alternate Nostril Breath

Just A little Overview

Alternate nostril breathing is a yoga breathing technique that helps you to control your breath. In Sanskrit, it is called as nadi shodhana pranayama. This translates as “subtle energy clearing breathing.”

This breathing technique can be used in both your yoga practice and your meditation practice. There is a wide variety of benefits to this technique. Please read on to discover the benefits and how to do the alternate nostril breath.

Video Demonstration

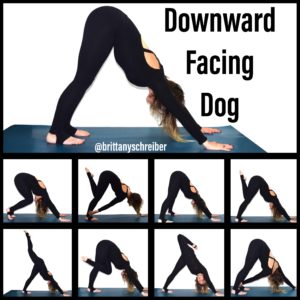
This video is a tutorial on how to do the alternate nostril breath. Check it to try out the breath in the comfort of your home. This video was made by yoga instructor @brittanyschreiber

Feel free to visit our YouTube page for more informative videos. And please like and subscribe to support our page.

Benefits of Alternate Nostril Breath

Alternate nostril breathing helps to:

  • relax your body
  • relax your mind
  • reduce anxiety
  • promote overall well-being

These benefits may help you to be more focused and aware.

Many students use this breathing technique to help manage stress in their daily life. They find that practicing alternate nostril breathing helps them to be more mindful of the present moment. It can reduce anxiety, fear and depression.

Read on to discover the other amazing benefits of alternate nostril breathing.

1. Lowers Stress

Most people do alternate nostril breathing to lower stress. In a 2013 study, researchers found that people who practiced alternate nostril breathing lowered their stress levels.

2. Improves Cardiovascular Function

In the same study, alternate nostril breathing was the only type of breath work that was found to have a positive effect on cardiovascular function. It was shown to significantly lower factors such as heart rate, respiratory rate, and blood pressure.

2. Improves lung function and respiratory endurance

Alternate nostril breathing may improve lung function and respiratory endurance. In a small 2017 study, researchers examined the effects of a pranayama practice on the lung functions of competitive swimmers. They found that it had a positive effect on respiratory endurance. This may help improve athletic performance.

3. Lowers heart rate

Lowering your heart rate can help to promote cardiovascular health. In a 2006 study, practicing a slow yoga breathing technique such as alternative nostril breathing may significantly decrease heart rate and average breathing rhythm.

4. Promotes well-being

Alternate nostril breathing may enhance overall health and well-being. It has also been shown to have a positive effect on mental health by reducing stress and anxiety.

5. Improve Athletic Performance

Research from 2011 found that a six-week alternative nostril breathing program had a positive impact on physical and physiological fitness-based performance.

6. Improvements to Neurocognitive, respiratory and metabolic functions.

In addition, researchers found in a  2018 review that different types of yogic breathing have many positive benefits for your health, including improvements to neurocognitive, respiratory, and metabolic functions in healthy people.

7. Balances the nervous System

Alternate nostril breathing was also found to increase breath awareness and have a beneficial effect on the nervous system.

How to do Alternate Nostril Breathing

Feel free to practice alternate nostril breathing on your own. It may be wise to ask but you a yoga teacher to show you the practice in person so you can make sure you’re doing it correctly.

When you are breathing, focus on keeping your breath slow, smooth, and continuous. Try to match the duration of the inhalation with the exhalation. Keep your focus on your breath to help you remember where you are in the cycle. This can improve your focus and help clear your mind.

I highly recommend watching the video listed early for a visual demonstration.

To practice alternate nostril breathing:

  1. Sit in a comfortable position with your legs crossed. You can also sit on a block or a pillow if needed to feel more comfortable.
  2. Make sure you are seated on your sit bones.
  3. Lengthen spine tall and pull your shoulders down and back
  4. Tuck your chin in slightly to engage the throat lock.
  5. Place your left hand on your left knee.
  6. Lift your right hand up toward your nose.

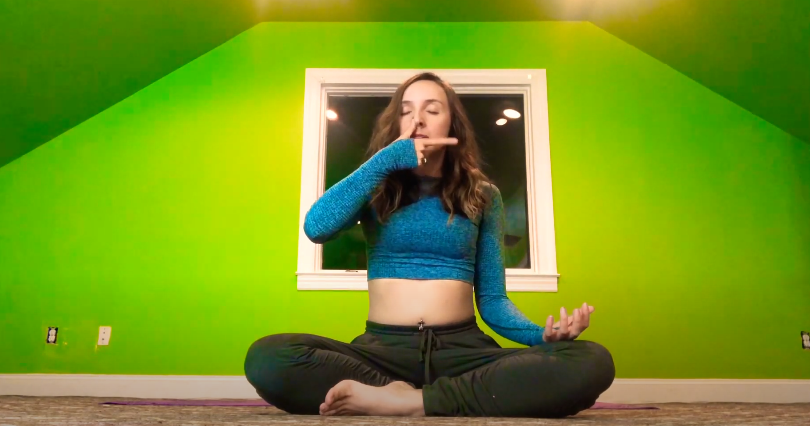
7. Exhale completely and then use your right thumb to close your right nostril.

8. Inhale through your left nostril and then close the left nostril with your fingers.

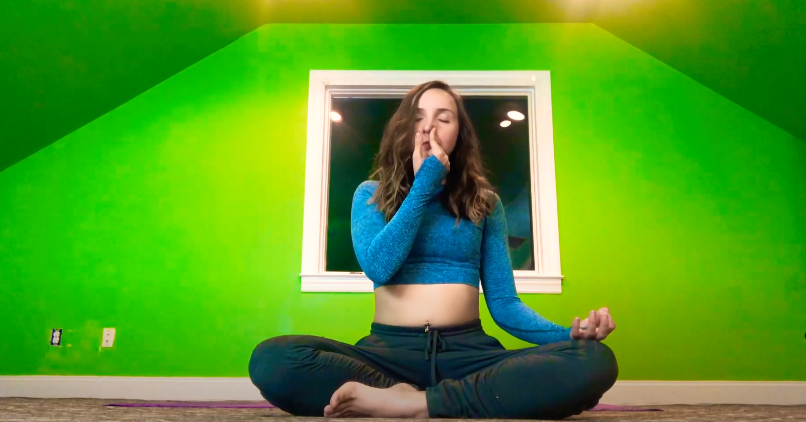
9. Open the right nostril and exhale through this side.

10. Inhale through the right nostril and then close this nostril.

11. Open the left nostril and exhale through the left side.

12. This is one cycle.

13. Continue for up to 5 minutes.

14. Always complete the practice by finishing with an exhale on the left side just to make sure you balance out the breath

Headstand Poses | 17 different Headstand Variations to Keep your Practice Fresh

Headstand which is also known as Sirsasana, is one the most practiced inversions out there along with handstand and shoulderstand. Headstands strengthen the vertebral column, core, the arms and the legs.

💪Some other benefits include calming the brain, relieving stress, increasing blood flow to the head, flushing out the adrenal glands and improving digestion.👌🏻👍🏻

I love to practice this pose daily because of the amazing benefits. 🙏🏻Yet sometimes doing the traditional headstand can get a little repetitive.

So to mix things up, feel free to try out these other variations and challenge yourself 😊 Also check out my Youtube channel below for a visual demonstration of the headstand variations: 

1. Forearm Headstand

2. Stork Headstand

3. Pigeon Headstand

4. Butterfly Headstand

5. Straddle Headstand

6. Lotus Headstand

7. Tripod Headstand

8. Zig Zag Headstand

9. Bound Headstand

10. Dandasana Headstand

11. Palms Up Headstand

12. Open Tripod Headstand

13. Eagle Headstand

14. Side Arrow Headstand

15. Zombie Press

16. Headstand Crunches

17. Headstand Split

Plank Variations

plank variations

Plank which is also known as Kumbhakasana is a widely recognized exercise both in personal training and yoga. Plank Pose strengthens all of the core muscles of the body, including the abdomen, chest, and low back. It also helps build strength in the arms, wrists, and shoulders.

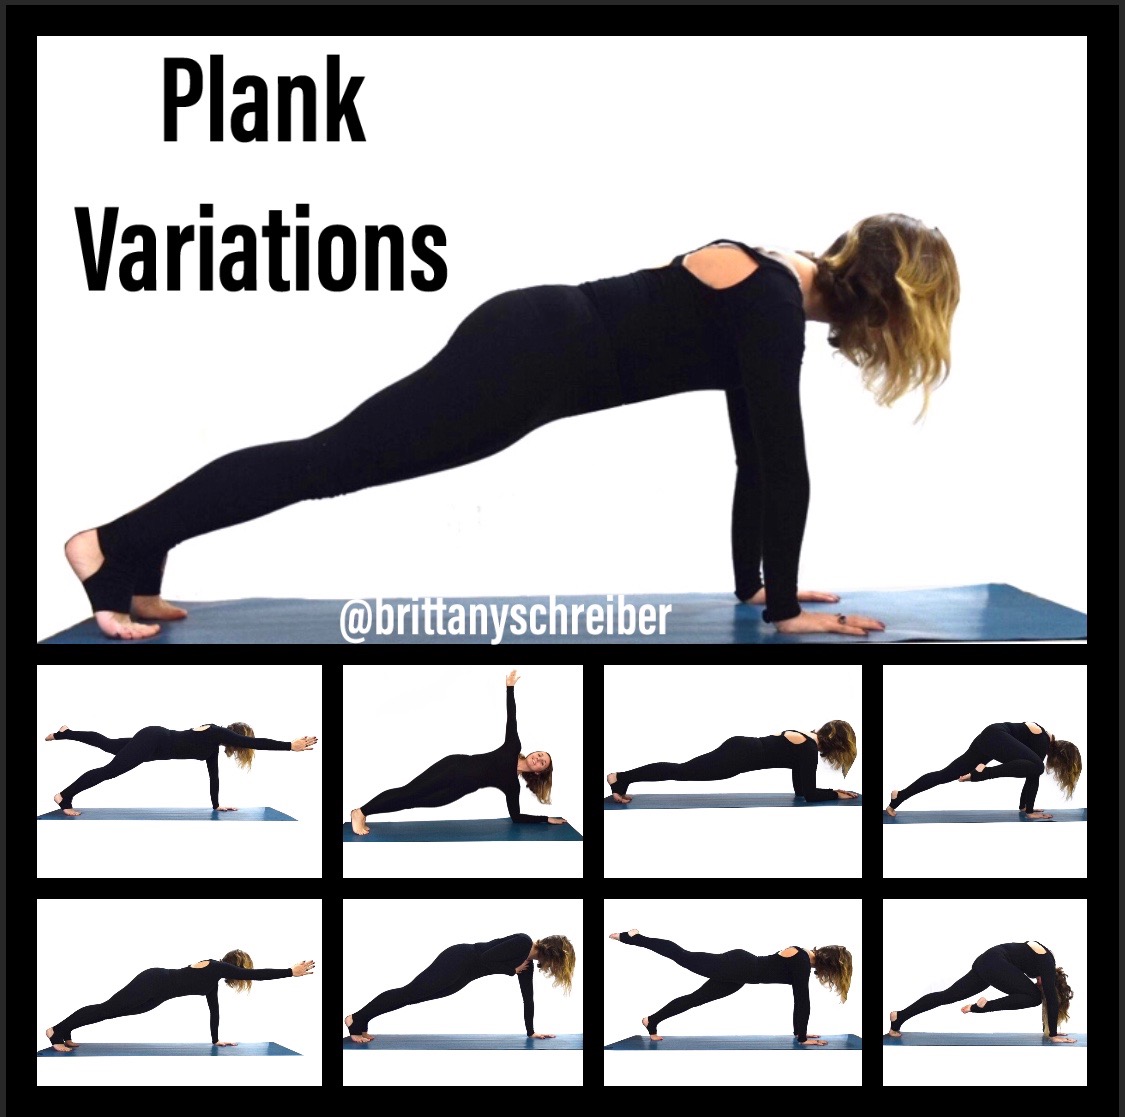
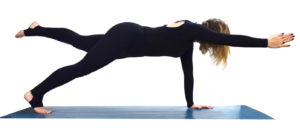
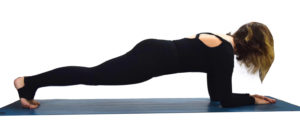
💪Some other benefits include improving balance, increasing muscle definition, heightening metabolism, reducing back pain, and reducing stress👌🏻👍🏻

I teach this pose in every single yoga class because of the amazing benefits. 🙏🏻
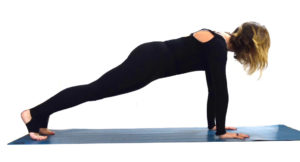
Yet sometimes doing the plank pose can get a little repetitive. 👯‍♀️👯‍♀️

So to mix things up, feel free to try out these other plank variations and challenge yourself 😊

1. Plank Pose

Plank Pose

  • Begin on your hands and knees
  • Place your hands directly underneath the shoulders
  • Extend your your feet back, lifting the hips off the mat.
  • Place your feet hip distance apart
  • Engage your core and make a straight line from the shoulders all the way to the ankles
  • Breath 😊

2. One Legged Plank

One Legged Plank

  • Begin on your hands and knees
  • Place your hands directly underneath the shoulders
  • Extend your your feet back, lifting the hips off the mat.
  • Place your feet hip distance apart
  • Engage your core and make a straight line from the shoulders all the way to the ankles
  • Lift one leg up keeping the both hips squared
  • Breath 😊

3. One Armed Plank

One Armed Plank

  • Begin on your hands and knees
  • Place your hands directly underneath the shoulders
  • Extend your your feet back, lifting the hips off the mat.
  • Place your feet hip distance apart
  • Engage your core and make a straight line from the shoulders all the way to the ankles
  • Lift one arm up keeping the shoulders squared
  • Breath 😊

4. Balancing Plank

Balancing Plank

  • Begin on your hands and knees
  • Place your hands directly underneath the shoulders
  • Extend your your feet back, lifting the hips off the mat.
  • Place your feet hip distance apart
  • Engage your core and make a straight line from the shoulders all the way to the ankles
  • Lift one leg up keeping the both hips squared
  • Lift the opposite arm up keeping the shoulders squared
  • Breath 😊

5. Hand to Heart Plank

Hand to Heart Plank

  • Begin on your hands and knees
  • Place your hands directly underneath the shoulders
  • Extend your your feet back, lifting the hips off the mat.
  • Place your feet hip distance apart
  • Engage your core and make a straight line from the shoulders all the way to the ankles
  • Draw one hand to your heart
  • Breath 😊

6. Knee to Elbow Plank

Knee to Elbow Plank

  • Begin on your hands and knees
  • Place your hands directly underneath the shoulders
  • Extend your your feet back, lifting the hips off the mat.
  • Place your feet hip distance apart
  • Engage your core and make a straight line from the shoulders all the way to the ankles
  • Draw one knee to your outer elbow
  • Breath 😊

7. Knee to Head Plank

Knee to Head Plank

  • Begin on your hands and knees
  • Place your hands directly underneath the shoulders
  • Extend your your feet back, lifting the hips off the mat.
  • Place your feet hip distance apart
  • Engage your core and make a straight line from the shoulders all the way to the ankles
  • Draw one knee to the crown of your head
  • Breath 😊

8. Forearm Plank

Forearm Plank

  • Begin on your hands and knees
  • Place your hands directly underneath the shoulders
  • Extend your your feet back, lifting the hips off the mat
  • Place your feet hip distance apart
  • Engage your core and make a straight line from the shoulders all the way to the ankles
  • Lower your elbows to the mat
  • Breath 😊

9. Half Chaturanga Plank

Half Chaturanga Plank

  • Begin on your hands and knees
  • Place your hands directly underneath the shoulders
  • Extend your your feet back, lifting the hips off the mat
  • Place your feet hip distance apart
  • Engage your core and make a straight line from the shoulders all the way to the ankles
  • Lower your elbows to the mat
  • Draw one elbow close to the chest
  • Breath 😊

10. One Forearmed Plank

One Forearmed Plank

  • Begin on your hands and knees
  • Place your hands directly underneath the shoulders
  • Extend your your feet back, lifting the hips off the mat
  • Place your feet hip distance apart
  • Engage your core and make a straight line from the shoulders all the way to the ankles
  • Lower your elbows to the mat
  • Lift one arm up keeping the shoulders squared
  • Breath 😊

11. Balancing Forearm Plank

Balancing Forearm Plank

  • Begin on your hands and knees
  • Place your hands directly underneath the shoulders
  • Extend your your feet back, lifting the hips off the mat
  • Place your feet hip distance apart
  • Engage your core and make a straight line from the shoulders all the way to the ankles
  • Lower your elbows to the mat
  • Lift one leg up keeping the hips squared
  • Lift the opposite arm up keeping the shoulders squared
  • Breath 😊

12. Side Forearm Plank

Side Forearm Plank

  • Begin on your hands and knees
  • Place your hands directly underneath the shoulders
  • Extend your your feet back, lifting the hips off the mat
  • Place your feet hip distance apart
  • Engage your core and make a straight line from the shoulders all the way to the ankles
  • Lower your elbows to the mat
  • Lift one arm up towards the ceiling, opening the chest and heart.
  • Breath 😊

I hope you found this article fun and informative. Feel free to connect with me on social media @brittanyschreiber and share this post!

Downward Facing Dog Poses – 10 New Ways To Do Downward Dog

Downward Facing Dog Variations

Downward Facing Dog which is also known as Downward Dog and Adho Mukha Svanasana, is one of the most recognized yoga poses of all time. Downward Dog pose stretches the hands, hamstrings, calves, shoulders and arches of the foot.

💪Some other benefits include calming the brain, relieving stress, improving digestion, energizing the body,relieving headache, back pain, insomnia and fatigue.👌🏻👍🏻

I teach this pose in every single yoga class because of the amazing benefits. 🙏🏻Yet sometimes doing the traditional downward facing dog can get a little repetitive. 👯‍♀️👯‍♀️

So to mix things up, feel free to try out these other variations and challenge yourself 😊 Also check out my Youtube channel below: 

19 Different variations of Downward Dog

1. Traditional Downward Facing Dog

Downward Facing Dog Pose

  • Feet are hip distance apart
  • Legs fully extended straight
  • Press the palms firmly into the matt shoulder distance apart
  • Engage the core
  • Make a straight line from your wrists to your hips
  • Breathe 😊

2. Knee Bent Downward Facing Dog

Bent Knee Downward Facing Dog

  • Feet are hip distance apart
  • Knees are bent slightly
  • Press the palms firmly into the matt shoulder distance apart
  • Engage the core
  • Make a straight line from your wrists to your hips
  • Breathe 😊

3. Head to Knee Downward Facing Dog

Head to Knee Downward Facing Dog

  • Feet are hip distance apart
  • Knees are bent
  • Press the palms firmly into the matt shoulder distance apart
  • Engage the core
  • Draw the crown of the head to the knees
  • Breathe 😊

4. Wide Legged Downward Facing Dog

Wide Legged Downward Facing Dog

  • Feet are wider than hip distance apart
  • Legs fully extended straight
  • Press the palms firmly into the matt shoulder distance apart
  • Engage the core
  • Make a straight line from your wrists to your hips
  • Breathe 😊

5. Twisted Downward Facing Dog

Twisted Downward Facing Dog

  • Feet are hip distance apart
  • Legs are fully extended straight
  • Press the palms firmly into the matt shoulder distance apart. Then with one arm, catch a hold of the opposite foot.
  • Engage the core
  • Lengthen the spine
  • Breathe 😊

6. Cow Face Legs in Downward Facing Dog

Cow Legs in Downward Facing Dog

  • Feet are hip distance apart
  • One leg fully extended straight
  • One leg with knee bent over the other (Cow Face legs)
  • Press the palms firmly into the matt shoulder distance apart
  • Engage the core
  • Make a straight line from your wrists to your hips
  • Breathe 😊

7. One Knee Bent Down Dog

One Knee Bent Down Dog

  • Feet are hip distance apart
  • One leg fully extended straight
  • One leg with knee bent and toes pointed up
  • Press the palms firmly into the matt shoulder distance apart
  • Engage the core
  • Make a straight line from your wrists to your hips
  • Breathe 😊

8. Three Legged Dog

Three Legged Downward Facing Dog

  • Feet are hip distance apart
  • One leg fully extended straight heel on matt
  • One leg fully extended straight with toes pointed up to ceiling
  • Press the palms firmly into the matt shoulder distance apart
  • Engage the core
  • Make a straight line from your wrists to your hips
  • Breathe 😊

9. Hip Opening Downward Facing Dog

Hip Opening Downward Facing Dog

  • Feet are hip distance apart
  • One leg fully extended straight heel on matt
  • Lifting the other leg up. Bend your knee and point your toe out to open the hip.
  • Press the palms firmly into the matt shoulder distance apart
  • Engage the core
  • Make a straight line from your wrists to your hips
  • Breathe 😊

10. Two Legged DogTwo Legged Downward Facing Dog

  • Feet are hip distance apart
  • One leg fully extended straight
  • One leg with knee bent and toes pointed up
  • Press the palms firmly into the matt shoulder distance apart
  • Take the arm opposite of the bent Knee to the straight leg.
  • Engage the core
  • Make a straight line from your wrists to your hips
  • Breathe 😊

I hope you found this article fun and informative. Feel free to connect with me on social media @brittanyschreiber and share this post!

Walk, Don’t Run

sunsets and yoga

So I have been reflecting upon the beauty of being present and enjoying all that is around you. I stumbled upon this poem that I just had to share. The poem is called Walk, Don’t Run by Rob Bell.

Walk Don’t Run

Walk, don’t run.
That’s it.
Walk, don’t run.

Slow down, breathe deeply,
and open your eyes because there’s
a whole world right here within this one. The bush doesn’t suddenly catch on fire, it’s been burning the whole time.

Moses is simply moving
slowly enough to see it. And when he does,
he takes off his sandals.

Not because
the ground has suddenly become holy,
but because he’s just now becoming aware that
the ground has been holy the whole time.

Efficiency is not God’s highest goal for your life,
neither is busyness,
or how many things you can get done in one day,
or speed, or even success.

But walking,
which leads to seeing,
now that’s something.
That’s the invitation for every one of us today,
and everyday, in every conversation, interaction,
event, and moment: to walk, not run. And in doing so,
to see a whole world right here within this one. —Rob Bell

God Calls Us to Trust in Our Uniqueness

Butterfly Headstand

I’m not sure what I’ll do, but —well, I want to go places and see people. I want my mind to grow. I want to live where things happen on a big scale.

🌺🌸🌺

This is a quote from F Scott Fitzgerald, my favorite author. There is something about how he sees the world that I just love. A lot of his writing focuses on the desire of love ❤

Yet something that I think that is amazing about this particular quote is the contentment with not knowing what he’s going to do. His peace is inspiring.

I know personally sometimes I stress out and I think to myself, what am I doing with my life?
I feel lost and confused. I don’t know what my purpose is. I don’t know my calling and I feel anxious.

But this anxiety is not from God.

God tells us to be peaceful and to trust the plans he has for us. For his plans are for good and not harm.
Also God made us all unique and all with our own unique purpose.

Maybe we don’t know our calling because we are called to do something that has never been done before.

🌺🌸🌺

God Calls You to Follow Your Dreams

handstand split

Reach high because the stars lie hidden in your soul. ✨✨

Do you believe in your dreams? Maybe you want to get that promotion, that dream job, to be accepted into that school,to meet the love of your life, to travel, to explore, to create, to inspire, to change the world.

YOU can make these dreams come true. Do you want to know the key to making it happen?

  • Believing in yourself
  • Having faith
  • Trusting god

Each of us has such a beautiful unique dream in us waiting to be unlocked. For These dreams were placed in us by god. And he wants to see us shine so bright. For he created us to be this way and to have this dream.

This week God showed me how important it is to honor the dreams he placed in us with faith and hope.

There may be times where our dreams are challenged. Where people will tell us, you’re never going to make it. You can’t do that. You’re not good enough. Where we may feel tempted to settle for less then what we really want.

But God calls us to persevere with hope and faith. We can silence these negative thoughts and these doubts. We just need to believe in ourselves. When we silence the doubters, and trust that God gave us our dream. We persevere with faith!

“I can do all things through Christ who strengthens me” Why would you believe a doubter when you can trust the God that designed you? He created you this way and knows the plans he has for you.

Don’t settle and keep dreaming because that’s when you see god move. That’s where he shows you how powerful he is. you’ll see the Fantastic Adventure In Trusting Him (faith).

So today I’m making a commitment. I’m choosing to trust God and chase my dreams ❤